1
2
3
4
5
6
7
8
9
10
11
12
13
14
15
16
17
18
19
20
21
22
23
24
25
26
27
28
29
30
31
32
33
34
35
36
37
38
39
40
41
42
43
44
45
46
47
48
49
50
51
52
53
54
55
56
57
58
59
60
61
62
63
64
65
66
67
68
69
70
71
72
73
74
75
76
77
78
| import cv2 as cv
import numpy as np
import tkinter
import tkinter.filedialog
import tkinter.messagebox
root = tkinter.Tk()
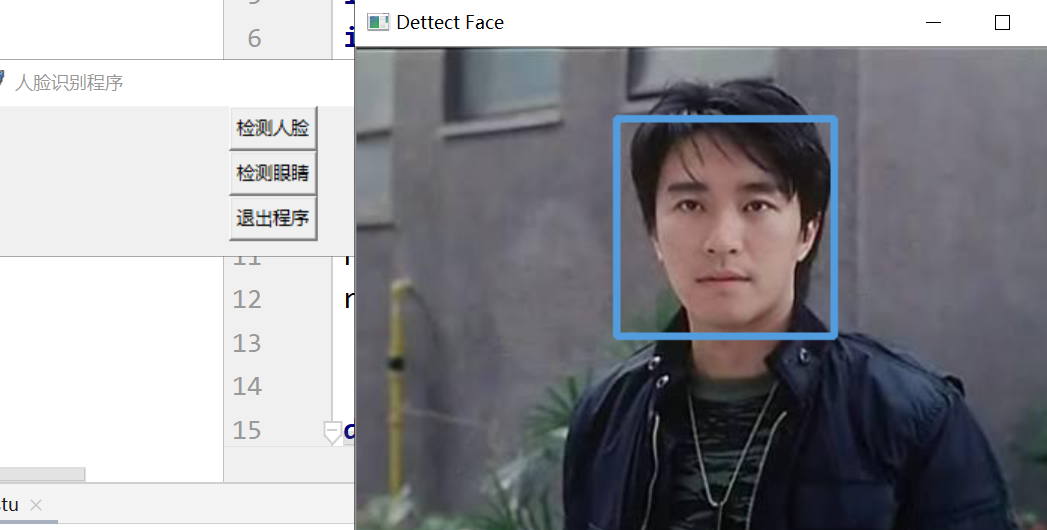
root.title("人脸识别程序")
root.geometry("399x100")
def func():
file_path = tkinter.filedialog.askopenfilename(title=u'选择文件', initialdir=r'C:\Program Files')
img = cv.imread(file_path)
face_color = (222,156,83)
grey = cv.cvtColor(img, cv.COLOR_BGR2GRAY)
classfier = cv.CascadeClassifier(
cv.data.haarcascades + "haarcascade_frontalface_alt2.xml")
faceRects = classfier.detectMultiScale(
grey, scaleFactor=1.2, minNeighbors=3, minSize=(32, 32))
if len(faceRects) > 0:
for faceRect in faceRects:
x, y, w, h = faceRect
cv.rectangle(img, (x - 10, y - 10), (x + w + 10,
y + h + 10), face_color, 3)
cv.imwrite('output1.jpg', img)
cv.imshow("Dettect Face", img)
cv.waitKey(0)
cv.destroyAllWindows()
print("识别完成!")
def funcII():
file_path = tkinter.filedialog.askopenfilename(title=u'选择文件', initialdir=r'C:\Program Files')
img = cv.imread(file_path)
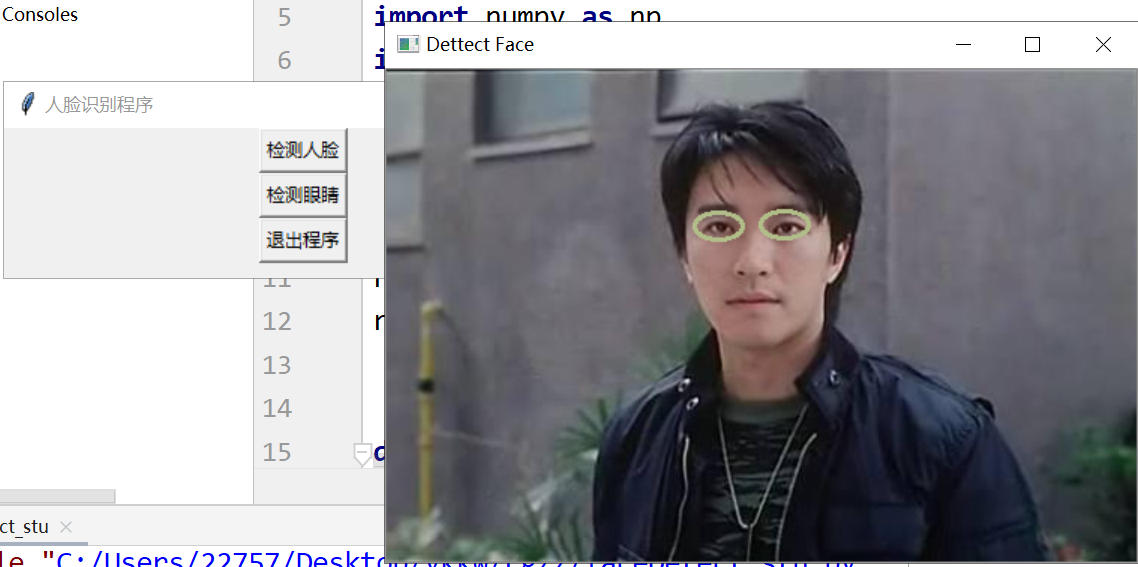
eye_color = (137,190,178)
grey = cv.cvtColor(img, cv.COLOR_BGR2GRAY)
classfier = cv.CascadeClassifier(
cv.data.haarcascades + "haarcascade_eye.xml")
faceRects = classfier.detectMultiScale(
grey, scaleFactor=1.2, minNeighbors=3, minSize=(32, 32))
if len(faceRects) > 0:
for faceRect in faceRects:
x, y, w, h = faceRect
cv.ellipse(img,(int(x+0.5*w),int(y+0.5*h)),(16,9),0,0,360,eye_color,2,3)
cv.imwrite('output1.jpg', img)
cv.imshow("Dettect Face", img)
cv.waitKey(0)
cv.destroyAllWindows()
print("识别完成!")
click_button = tkinter.Button(root,text="检测人脸",command=func)
click_button.pack()
clickII_button = tkinter.Button(root,text="检测眼睛",command=funcII)
clickII_button.pack()
quit_button = tkinter.Button(root,text="退出程序",command=root.quit)
quit_button.pack()
root.mainloop()
|